
Mar 19, 2026
Creating a Black Friday Banner in Shopify

Today I would like to share with you the process I went through to design and implement the Black Friday banner for Sticky Vinyl in 2025, a well-known Australian store that sells vinyl for arts and crafts as well as tools for it. This is part of our monthly maintenance for their Shopify e-commerce website as part of Sanico’s Shopify services. The purpose of this banner was to let customers know that there is a sale going on and how much longer the sale was going to last for. This encourages the customers to purchase products while the sale lasts.
The requirements
The following were the requirements for the banner given to me by Sav, one of the lead devs of Sanico Software:
- It should be located at the very top of the page, above the navigation bar.
- It should only show when the sale is commencing, namely from Friday to Sunday inclusive in the Adelaide timezone.
- It should count down the number of days, hours, and minutes left before the sale ends.
- It should have a unique design similar to the rest of the website and a reference image I was given.
The following was the reference image Sav gave, with the red crosses indicating that I shouldn’t include those elements from the reference image.

Getting started: Hardest part first, one step at a time
Typically with any problem or task I always try to figure out the hardest part first, or at least get a rough picture of how to do it before starting. This (likely) ensures that at least the task would be possible to complete, preventing me from wasting time on the other easier parts before inevitably finding out the task was not possible or the right one to do in the first place.
Unlike creating service pages for Luciano Concrete’s website, this was more of a technical challenge rather than a design one. In this case, the hardest part of this task that I could think of is dealing with dates and timezones, since timezone conversions are error-prone with its many rules and edge cases. Specifically:
- Deciding when to show the banner: how can I know whether the sale is currently ongoing?
- If we are showing the banner, determining the amount of time left before the sale ends.
Dealing with timezones in vanilla JS
When I first hear “timezones”, my mind instantly jumps to a library like moment.js, because in my past experience, dealing with timezones is a huge headache, and so I would rather delegate that to a library instead of implementing it myself. However, Sanico has a strong preference for relying on as little JS libraries (or dependencies in general) as possible, to reduce the risk of vulnerabilities and it changing over time.
I thought this would be an exception to this rule because of how complicated timezones are, so I directly asked Sav whether I could just use this library for just this one time. However, that was where my mistake was: I didn’t even bother to look up vanilla JS solutions to timezones but instead assumed there wouldn’t be one. Funny enough, just as Sav sent me the link to the MDN docs on Intl.DateTimeFormat, I found that page and was reading it.
So yes, this Intl.DateTimeFormat is one of the ways to convert dates and times between different timezones. Its constructor accepts an option object, allowing you to specify how you want dates to be formatted when you pass in a date into its .format() method. Importantly, this object allows you to specify the timezone you want the date to be formatted in. Since the Date() constructor returns the current time in the user’s timezone, we can simply pass this into Intl.DateTimeFormat.format() to find the current time in Adelaide! Thank you Ion Prodan for your article on how to use Intl.DateTimeFormat which inspired my solution to this problem.
const dateTimeFormatter = new Intl.DateTimeFormat("en-AU", {
  year: "numeric",
  month: "numeric",
  day: "numeric",
  hour: "numeric",
  minute: "numeric",
  second: "numeric",
  hour12: false,
  timeZone: "Australia/Adelaide",
});
const currentDateFormatted = dateTimeFormatter.format(new Date());
With this currentDateFormatted string, I could extract the relevant time details using a regular expression (regex) with named capturing groups and create a new date object containing the current time in Adelaide, which we can use to help solve the two problems mentioned previously.
const dateRegex =
    /(?<day>\d{2})\/(?<month>\d{2})\/(?<year>\d{4}), (?<hour>\d{2}):(?<minute>\d{2}):(?<second>\d{2})/;
const currentDateParts = currentDateFormatted.match(dateRegex).groups;
const currentDate = new Date(
	currentDateParts.year,
	currentDateParts.month - 1,
	currentDateParts.day,
	currentDateParts.hour,
	currentDateParts.minute,
	currentDateParts.second,
); // -1 on month since it's month index
return currentDate;
But what about edge cases?
Now, this was a custom implementation I’ve written using vanilla JS, which obviously would not be as polished and robust as an implementation by a JS library like moment.js. There are indeed many pitfalls with time that I could’ve fallen into.
However, given that this was a temporary feature, I believe this implementation without a full consideration of all possible edge cases is sufficient. It is simply not worth blowing over our client’s budget for having a more robust and precise implementation for 0.1% of cases. Furthermore, this banner is only a nice aesthetic indicator that reminds customers of the time-limited nature of the sale, producing more sales in that time period; the actual sale logic is handled by Shopify and not this banner. Thus in the worst case where something goes wrong with the banner, it will not cause the business to lose money, at least through the sale lasting beyond what it should have. It still would harm the user experience by e.g. setting up the expectation of a sale when there isn’t one going on, which is why we would resolve any bugs and issues as quickly as possible when they come up.
Addressing the two hardest parts
Now with the ability to find the current date and time in Adelaide regardless of where the user is, we can now tackle the two hardest parts listed previously by working entirely in the Adelaide time zone, starting with the first one. It’s always helpful to take things one step at a time.
Deciding when to show the banner
We first store the sale start and end dates as Date objects. I am using Stimulus JS here, so I stored them as values inside of the banner controller. (If you don’t know what these are, don’t worry too much about it; all you need to know here is that we access these values by using this and appending Value to the end of the value name.)
// Remember it's "month index" so it's the actual month number - 1
static values = {
	startDate: { type: Date, default: new Date(2025, 11 - 1, 28, 0, 0, 0) },
	endDate: { type: Date, default: new Date(2025, 12 - 1, 1, 0, 0, 0) },
};
We should only show the banner if the current date and time is after the startDate and before the endDate (i.e., the endDate is after the current date and time). One way to compare Date objects is to compare the number of milliseconds in between 1 January 1970 (the epoch) and the moment in time specified by the date, obtainable through the .valueOf() method. Thus a Date object specifies a more recent moment in time than another Date object if it has a larger value, i.e. their difference is positive. So, we can phrase our two requirements in terms of boolean expressions, and then only show the banner if both requirements are true.
showBlackFridayBanner(currentTime) {
	const isAfterStart =
		currentTime.valueOf() - this.startDateValue.valueOf() > 0;
	const isBeforeEnd = this.endDateValue.valueOf() - currentTime.valueOf() > 0;
	if (isAfterStart && isBeforeEnd) {
		this.announcementsBannerTarget.dataset.hidden = true;
		this.blackFridayBannerTarget.dataset.hidden = false;
		return true;
	}
	return false;
}
To actually make the banner visible, I used Stimulus JS targets to grab the Black Friday banner element and set its data hidden property to be false. Back in the HTML, I used Tailwind CSS to specify that if the data hidden property is true, apply the hidden class, which applies a display: none; style to the element (thanks Dom, the other lead dev of Sanico Software, for the trick!). I also hid the regular announcements banner which was originally there; otherwise the top banner gets too thick. More on why I returned true and false later.
<section
	class="data-[hidden=true]:hidden (...)"
	data-announcement-banner-black-friday-target="blackFridayBanner"
	data-hidden="true"
>(...)</section>
With this implemented, I tested it to ensure it works. Since I’m only testing whether it’s showing in the correct times or not, some dummy text would do (greeting who I’m working with is my favourite dummy text). It’s important to do things step-by-step, testing whether each function is working before moving on, so that debugging doesn’t become a huge spaghetti headache later on.
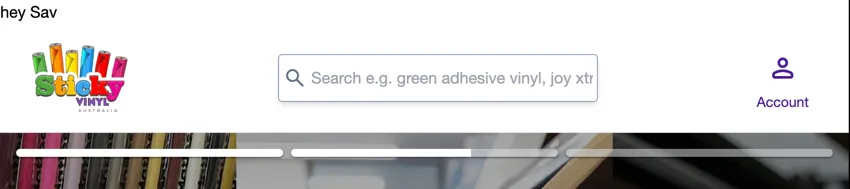 Testing things to do with time is a bit tricky though, since the sale is still in the future. To get around this, I temporarily substituted the
 startDate and endDate’s with other values, namely to specify:
- a time period where the banner should be showing now,
- a time period where the banner shouldn’t be showing now, specifically when we are now already past the current date.
Note we don’t need an additional test case for whether this correctly does not show the banner before the actual sale period because that was the condition I was developing in: before the Black Friday sale 😆.
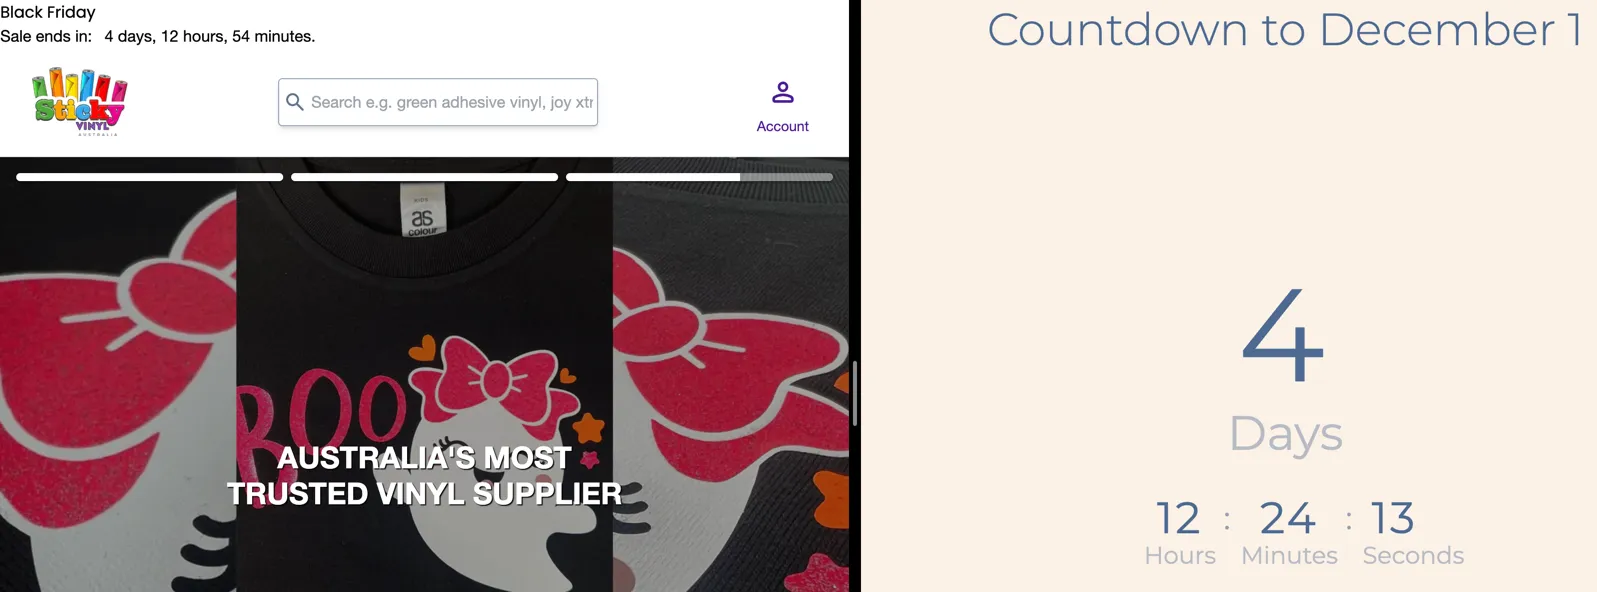
Determining the amount of time before the sale ends
Now that we’ve determined whether we should show the banner, we now need to calculate the amount of time left before the sale ends if we are showing the banner. We can again make use of the .valueOf() method here to get the number of milliseconds between the current time and the sale endDate. Afterwards, we can find out how many minutes, hours, and days left there are using some math, rounding it down to the nearest integer. We do this since we don’t need that much accuracy, and to be on the safe side when it comes to not telling the customer that there is still a sale when it’s already over. We’re also using the modulo operator next.
loadBlackFridayBannerDates(currentTime) {
	const millisecondsLeft =
		this.endDateValue.valueOf() - currentTime.valueOf();
	const minutesLeft = Math.floor(millisecondsLeft / 1000 / 60);
	const hoursLeft = Math.floor(minutesLeft / 60);
	const daysLeft = Math.floor(hoursLeft / 24);

	// Determine numbers to display
	const minutes = minutesLeft % 60;
	const hours = hoursLeft % 24;
	const days = daysLeft;

	// Display these numbers
	this.minutesTarget.innerText = minutes;
	this.hoursTarget.innerText = hours;
	this.daysTarget.innerText = days;
}
We can’t just display these as they are though, since they represent the total amount of time left in minutes, in hours, and in days. What we’re really interested in is the number of days, hours, and minutes left, where adding them up together gives us the amount of time left before the sale ends. So we need to take the modulo of the amount of time left in hours and minutes, since anything equal to or above 24 hours is recorded as a day, and anything equal to or above 60 minutes is recorded as an hour.
Last but not least, we need to display these values on the banner, which I did by setting the innerText of the <span> elements for these values. (Since I haven’t done the styling, this allows for the most flexibility for whatever styling needs I have later.) I got access to these elements using Stimulus JS targets.
Again, with this implemented, I tested to see whether it works before moving on. Here I’m testing to see whether it’s showing the correct dates, so I just added the HTML I needed with no styling to see whether it works properly. To ensure the values are correct, I opened a countdown to a date website and compared them, keeping in mind that I was residing in a timezone 30 minutes ahead of Adelaide at that time (pun intended).
Putting it together
With these two problems solved, we can now put this together in the connect() function of the controller, which runs when the controller gets connected to the DOM (no, not that Dom, but the DOM). First, we get the current time in Adelaide time, then if we should show the banner, we will set the amount of time left before the sale ends. This is why I made the .showBlackFridayBanner() method return a boolean value: to indicate whether we should show the banner or not.
static values = {
	(...)
	refreshRate: { type: Number, default: 10_000 }, // in milliseconds
};

(...)

connect() {
	let currentTime = this.currentTimeInAdelaideTime();
	if (this.showBlackFridayBanner(currentTime)) {
		this.loadBlackFridayBannerDates(currentTime);
		setInterval(() => {
			currentTime = this.currentTimeInAdelaideTime();
			this.loadBlackFridayBannerDates(currentTime);
		}, this.refreshRateValue);
	}
}
Notice also here I’ve used setInterval to periodically update the values in the banner’s time values every 10 seconds. This is so that if the user spends enough time on a page such that the number of minutes has decreased, it would update (eventually). Again, we don’t need an extreme level of accuracy here, so once every 10 seconds will do, keeping in mind the potential performance impact.
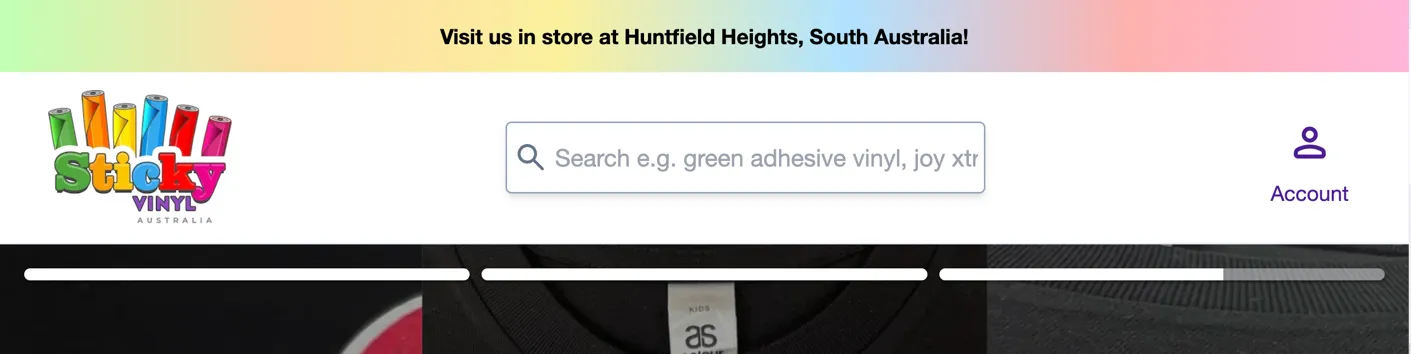
Styling the banner
After exhaling in relief of figuring out the hardest part of the problem, I turned my attention to styling the banner. When making a new component for an existing website, I always consider the existing design and components already present, looking to incorporate them into the new component I’m making. Not only does this save time, but it also helps make the design more consistent.
The most relevant component to the Black Friday banner is the existing announcements banner. Sticky Vinyl generally has a colourful aesthetic with its six-coloured logo, and the background of this banner is no exception, being the gradient between those colours. Since I wanted to make the aesthetic of the Black Friday banner similar to this, I took this gradient (which is the most distinguishing factor of this component) also to be the background of the banner.
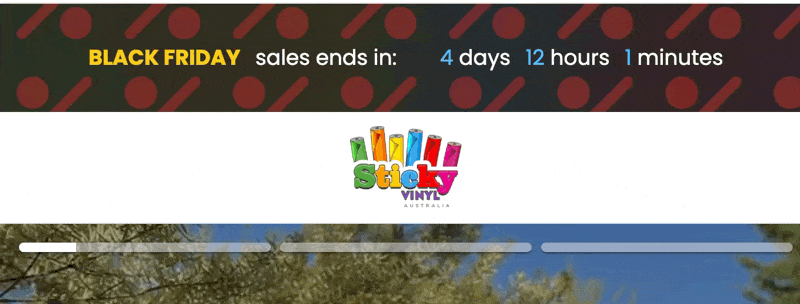
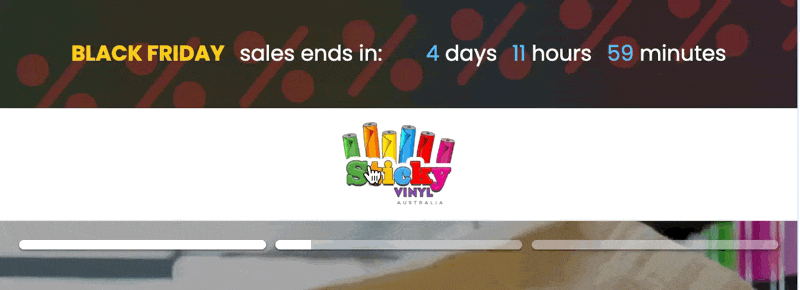
At the same time, this banner should be eye-catching and different enough from the existing banner, since this is a special once-in-a-year event. For external consistency with other websites, this banner should have an overall black aesthetic since, well, it’s called Black Friday. I decided to do this by adding a low-opacity version of the colourful gradient on top of a black background to still give it that character akin to the website. And for colouring the text to highlight the “Black Friday” text and the numbers, I decided to use the yellow and light blue colours which were already present in other parts of the home page, so as to not introduce even more colours and since I thought these bright colours would work nicely on the dark background.

Finishing touches and considering alternatives
This is a great start, however as seen in the original reference image, there should be some “%” symbols to attract some more attention. Sales are typically in red and there is a red colour in the logo and the home page, so I thought to continue the colourful aesthetic I would use a translucent red for them. I also added a subtle pulse animation provided by Tailwind CSS to attract a bit more attention.
 This was implemented using two absolute
 <div> elements and by making use of repeated backgrounds across the horizontal axis.
<div class="absolute inset-0 -z-10 opacity-50">
	<div class="absolute -top-12 size-full animate-pulse bg-[url(./icons/percent.svg)]"></div>
	<div class="absolute -bottom-12 size-full animate-pulse bg-[url(./icons/percent.svg)]"></div>
</div>
However, to not get fixated on the design of the given reference image, I decided to try one more alternative design. This time, with just one row of “%” symbols that is rotated at an angle. This gives it a slightly different feel, making it feel more infused with the background. I also had to lower the opacity given that text was now sitting on top of it.
 At the end of the day though, we are making websites for clients, so it’s the client (and/or my boss) to decide which one will prevail. Sav liked the first one (with two rows) better, and the client agreed, so that one went live on the website.
Concluding remarks
In summary, the Black Friday banner was made by first fleshing out the functionality and then styling it. The functionality implementation was made possible using the Intl.DateTimeFormat object from vanilla JS which allowed us to convert times into the Adelaide timezone. Styles were inspired from the original banner, the given reference image, and other existing components on the website’s home page for consistency.
Note that sometimes the hardest or most concerning part isn’t always the technical side like in this case; it could also be the styles if it’s something novel. It also depends on the person too; someone with more experience in dealing with timezones in JS might think the styles is of a bigger concern than the function implementation.
Unfortunately, the Black Friday sale is already past at the time of writing, however you can still check out Sticky Vinyl at https://stickyvinyl.au/.
I often shy away from tackling unfamiliar tasks because of my fear of the unknown. In this case, directly turning to a library instead of trying the vanilla JS way first. But here, after some investigating and help from others, I was able to figure it out. All research must start somewhere, no matter how daunting or slow it might initially feel. A little bit of trust can go a long way in finding a solution and pushing ourselves outside of our comfort zones to grow.